Learn how to make delicious homemade crescent rolls. They are perfect for holiday gatherings and family dinners and are ideal for family bakers, homemakers, and homesteaders.
With Thanksgiving right around the corner (I know, shhh...), now is the perfect time to start mastering all those yummy recipes so you have them perfected by Thanksgiving dinner. One such recipe that will surely impress your guests is homemade crescent rolls. These delightful, buttery, flaky rolls are a perfect addition to any meal, especially a festive Thanksgiving feast.
I know it’s easy to go to the store, grab a few cans of crescent rolls, pop them open, and bake them. But you truly don't get the flavor and taste of a homemade crescent roll. Let’s dive into why homemade crescent rolls are worth the effort and how you can make them yourself!
The Magic of Homemade Crescent Rolls
Homemade crescent rolls are an easy, intermediate bread that will elevate your baking game. Using just a few pantry ingredients and some activated dry yeast, you can create these delicious rolls that are far superior to their store-bought counterparts. Not only do they taste better, but they are also more cost-effective. Plus, there's something incredibly satisfying about baking bread from scratch and watching your family and friends enjoy the fruits of your labor.
Why Use Scaled Milk?
First things first, let’s talk about scalded milk. Scalded milk is milk that has been heated to just below boiling and then cooled. You might wonder why this step is necessary. Scalding milk for bread, including crescent rolls, has several benefits.
- 1. Improves Dough Texture: Scalding milk helps denature the proteins in the milk, which can inhibit gluten formation. This ensures the dough is softer and more tender, resulting in that light, airy texture we all love in crescent rolls.
- 2. Enhances Flavor: Scalding milk brings natural sweetness and richness, adding depth to the crescent rolls' overall flavor.
- 3. Better Yeast Performance: If you're using fresh milk, scalding can kill any bacteria and deactivate enzymes that might otherwise interfere with the yeast's ability to perfectly. While it might seem like an extra step, it can significantly affect the final product.

Why Malleable Butter?
Butter is crucial in crescent rolls, giving them their signature flaky layers and rich flavor. But why does the butter need to be malleable? When making crescent rolls, you incorporate butter into the dough to create multiple thin layers, much like in puff pastry. This process is known as lamination.
If the butter is too cold, it will be challenging to work into the dough evenly, leading to uneven layers and pockets of butter. If it's too soft or melted, it will blend into the dough instead of creating layers. Malleable butter—cool but pliable—strikes the perfect balance, allowing you to roll and fold the dough effectively. This results in those beautiful, distinct layers that make crescent rolls so deliciously flaky.
Why Eggs in Crescent Rolls?
Eggs play a vital role in the structure and richness of crescent rolls. They provide additional moisture, which helps to keep the rolls tender. The proteins in the eggs also contribute to the dough’s structure, helping it rise and hold its shape.
Moreover, eggs add a subtle richness and depth of flavor that complements the butter and milk. They also help give the rolls a beautiful golden-brown color when baked, making them look as delicious as they taste.
Shaping Crescent Rolls
Shaping crescent rolls is a fun and rewarding part of the process. Here’s how to do it step by step:
- 1. Roll Out the Dough: After your dough has risen, punch it down and roll it out into a large rectangle on a lightly floured surface. Aim for a thickness of about ¼ inch.
- 2. Cut the Dough: Divide the rectangle into long triangles using a sharp knife or a pizza cutter. The base of each triangle should be about 4-5 inches wide.
- 3. Add Butter (Optional): For an extra buttery flavor, you can brush a thin layer of softened butter over the surface of each triangle.
- 4. Roll the Triangles: Roll each triangle towards the tip from the wide end. As you roll, gently stretch the dough to create a tighter spiral. The tip of the triangle should end up tucked under the roll.
- 5. Curve into Crescents: Once rolled, gently bend the rolls into a crescent shape and place them on a baking sheet lined with parchment paper. Leave enough space between each roll to allow for expansion.
Can You Make Them Ahead of Time and Bake Later?
Yes, you can make crescent rolls ahead of time and bake them later, which is especially helpful for busy holiday preparations. Here’s how you can do it:
- 1. Refrigerate the Dough: Prepare the dough and shape the rolls as usual. Instead of letting them rise a second time at room temperature, cover the shaped rolls with plastic wrap and place them in the refrigerator. They can stay there for up to 24 hours. When ready to bake, let them come to room temperature and rise before baking.
- 2. Par-Bake Method: Another option is to bake the rolls partially. Bake them at a lower temperature (around 300°F) for 10-15 minutes until they start to set but are not browned. Let them cool, then freeze them. When ready to serve, bake the frozen rolls at 375°F until golden brown and fully cooked.
How to Freeze Crescent Rolls:
Freezing crescent rolls is a great way to ensure you always have fresh rolls on hand for any occasion. Here’s how you can do it:
- 1. Freeze Unbaked Rolls: After shaping the rolls, place them on a baking sheet lined with parchment paper. Freeze until solid, then transfer them to a freezer-safe bag or container. When you’re ready to bake, let them thaw and rise at room temperature before baking as usual.
- 2. Freeze Baked Rolls: Bake the rolls as directed and let them cool completely. Once cooled, wrap them tightly in plastic wrap and place them in a freezer-safe bag or container. To reheat, thaw at room temperature or in the refrigerator, then warm in the oven at 350°F (175°C) for about 10-15 minutes.
- 3. Flash Freeze: For both methods, you can flash freeze the rolls first by placing them on a baking sheet in the freezer for a couple of hours. Once they’re solid, transfer them to a freezer-safe bag. This prevents them from sticking together and allows you to take out as many rolls as you need.
Easy Step-by-Step Recipe:
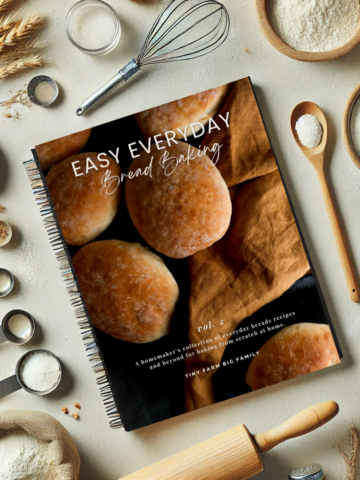
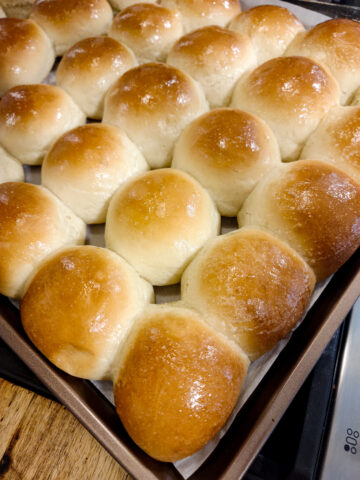
My easy step-by-step recipe makes 24 crescent rolls for $2.50! It's perfect for feeding a crowd without breaking the bank. Plus, homemade crescent rolls taste far superior to anything you can buy in a can. Interested in my family's favorite and tried-and-true recipe? You can grab it in my Everyday Bread Recipes Vol. 2
Making homemade crescent rolls is a delightful and rewarding experience that brings a touch of homemade love to any meal. With Thanksgiving just around the corner, now is the perfect time to master this recipe and impress your guests with your baking prowess. Whether you’re serving them at a festive holiday dinner or a cozy family meal, homemade crescent rolls will surely be a hit.



Rick Markealli says
Thank you so much for your wonderful recipes.